Action Button
The action button lets you quickly add content to your Spaces, create new ones, or leave 3D Voiceys with just a few tap. To use the Action Menu click on the Button located in the bottom right corner. (see image 1)
 Add annotation 2
Allows you to add a description. The position is freely selectable and can be changed subsequently. Section Rich Text Annotations offers a more detailed overview.
Insert Sound Entities 3Insert the Sound Entity with spatial sound effect at a custom position. Further details are provided in section Sound Entity.
Voicey 4More information can be found in section Recording a Voicey.
Dynamic Gates 5Check out section placing dynamic Gates for detailed information.
Place additional Models 6Allows you to place meshes and splats to a desired position. The position is freely selectable and can be changed subsequently. See section Additional Content for more in-depth information.
2Rich Text Annotations
Annotations serve as interactive labels within your space, allowing you to provide detailed explanations or descriptions for specific elements. You can also enrich these annotations with embedded images or videos.
Placing Annotations
To place an annotation, choose the Annotation option from the icon and click on the desired location in your space. Upon initial placement, the Edit Annotation interface will appear, where you can input and format your descriptive text.
Edit Annotations
To edit an annotation after its initial placement, you can either double-click on its icon within the space or click directly on the annotation's text. This will open the annotation's editing panel.
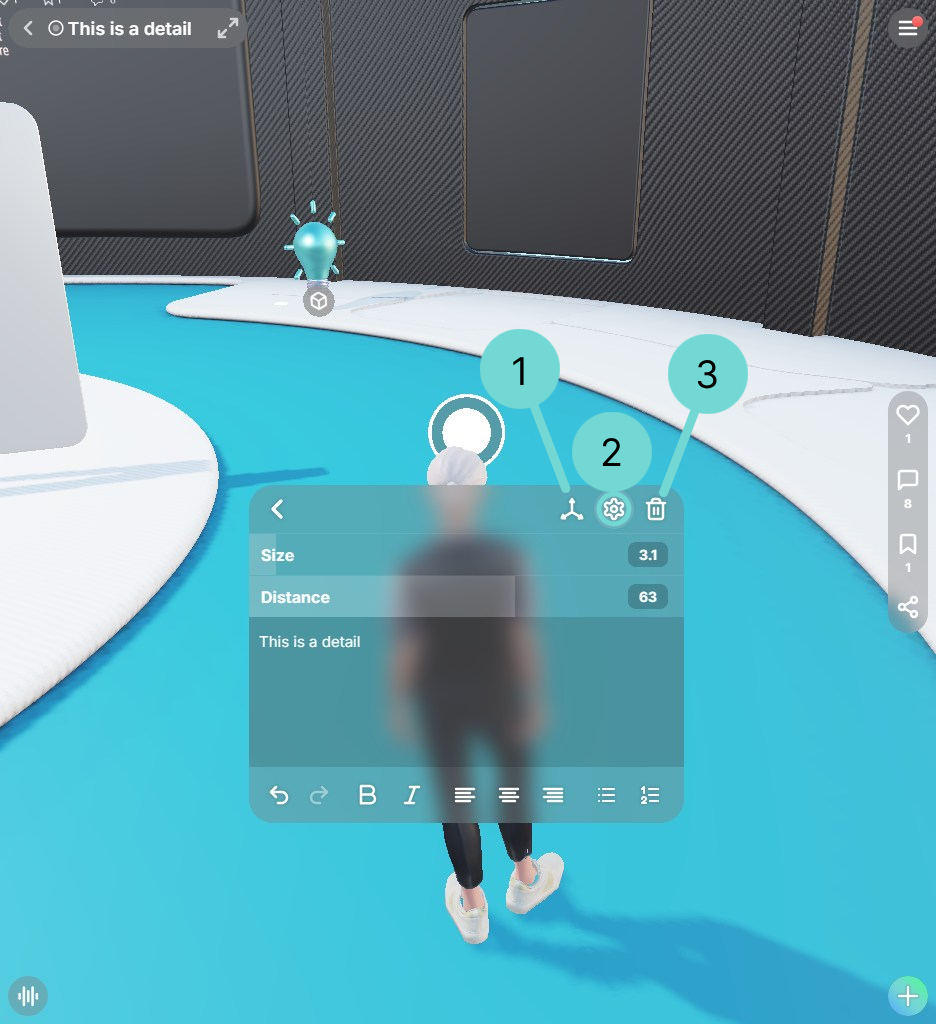 Open Gizmo 1
Clicking this button will activate the annotation's gizmo, allowing you to reposition the associated text label.
Open Settings 2The annotation settings provide options to resize the annotation icon itself and control its visual perspective based on distance. Typically, closer objects appear larger than distant ones. The distance slider allows you to adjust how much the annotation icon's size changes based on the viewer's perspective.
Example
The following images illustrate the effect of the distance setting. In both images, the creator's viewing position and the annotation's inherent size are identical. Only the distance value has been modified:
- A high distance value means the annotation's size changes less as the viewing angle shifts (as seen in the left image).
- A low distance value means the annotation's size changes more noticeably with changes in viewing angle (as seen in the right image).
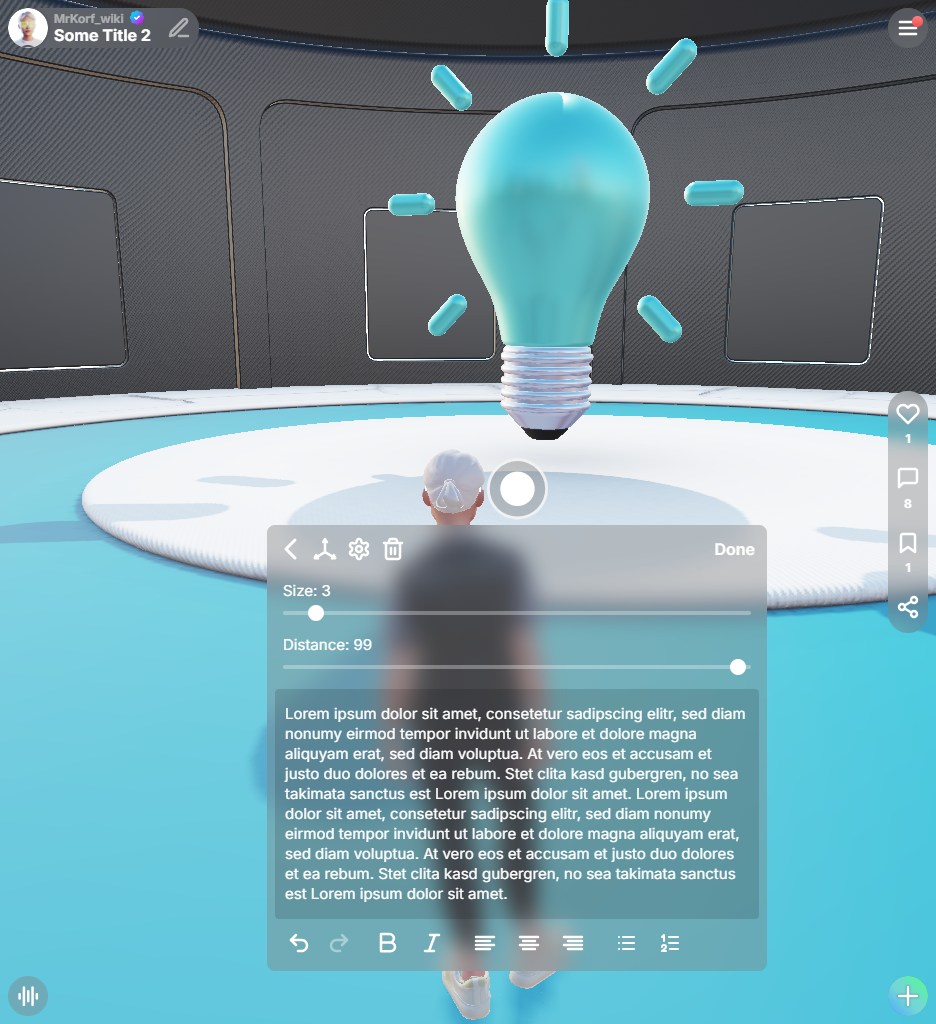
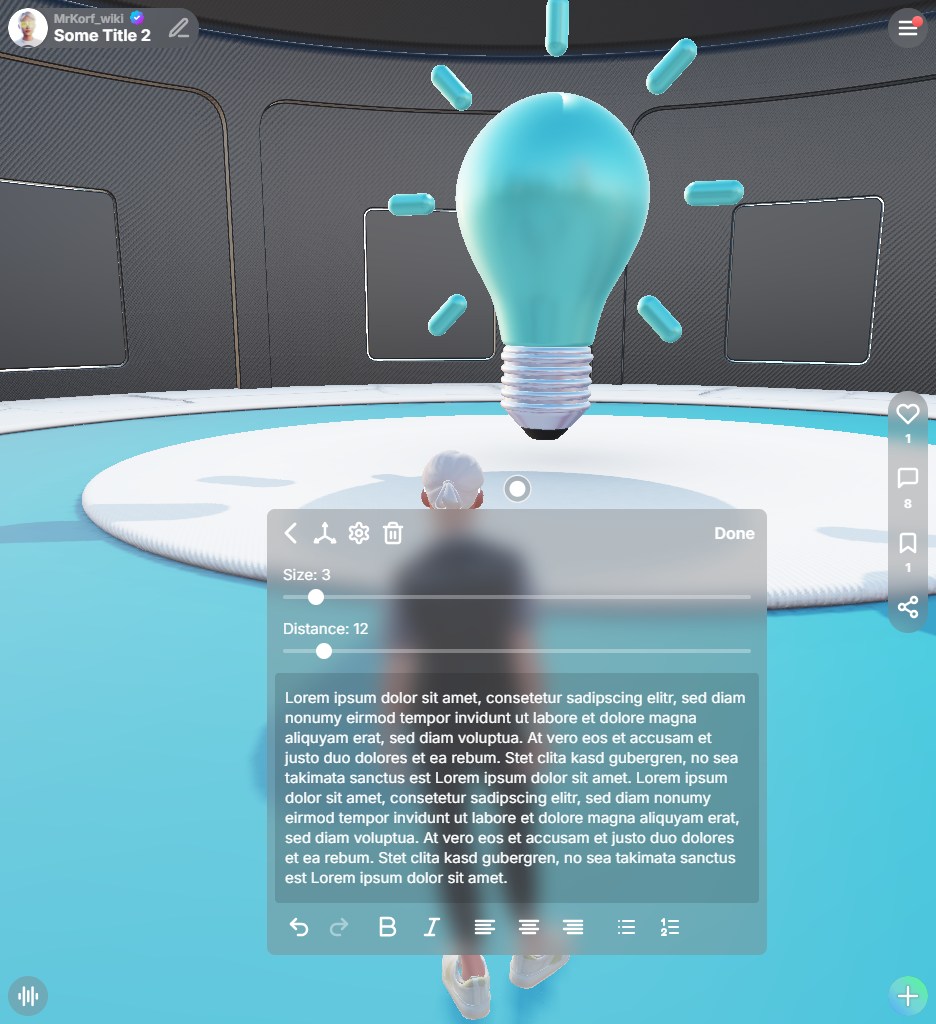
There are min and max values for size and distance. This is intentional to limit errors - that's no bug. The size is between 2 and 20 and the distance ist between 5 and 100.
Removes the currently selected annotation from the space.
Visitor View
When someone visits a Space containing annotations, they can reveal the description by hovering their mouse over the annotation icon (on desktop). To persistently display an annotation, they can click on the inner circle, which will turn white and become larger, effectively pinning it. Clicking the inner circle again will unpin the annotation, returning it to its light gray state.
Advanced Editing Options
Annotations can include more than just text — you can also add images, social media cards, links, and YouTube videos.
- Social Media Cards
- Images
- Links
- Youtube
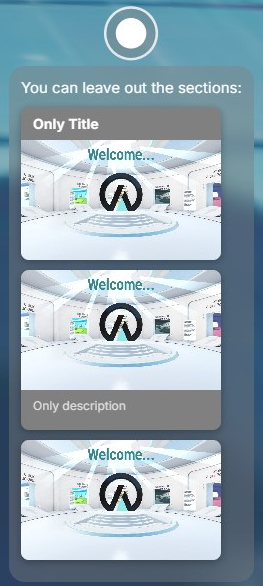
Custom Social Media Cards of Spaces
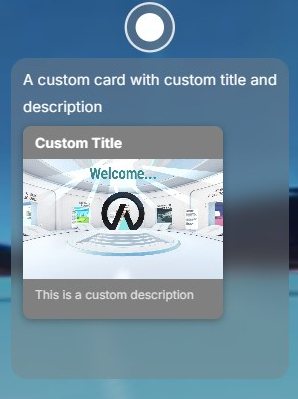
Use the @[card] keyword to display the social card inside an annotation. First pass the link inside the round brackets. The first two quotation marks are used for the title and the second one for a description. This option is only available for space links.
@[card](https://live.arrival.space/welcome "Only Title" "")
@[card](https://live.arrival.space/welcome "" "Only description")
@[card](https://live.arrival.space/welcome "" "")
@[card](https://live.arrival.space/welcome "Custom Title" "This is a custom description")
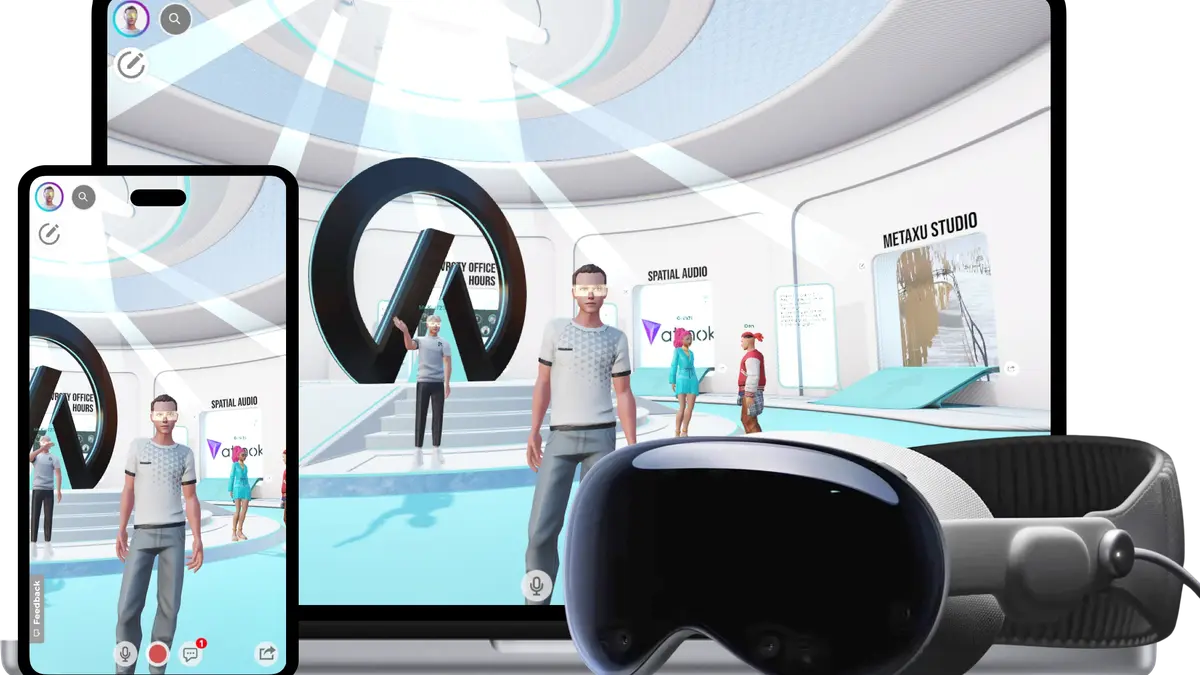
Images
To add an image it has to be uploaded to a server. This means it must be available on a public website. The following example uses an image from a newspaper.
Links
If you only want to add a link without social card use the following code. The text inside the square brackets defines the title.
[Link to Wikipedia](https://wikipedia.org)

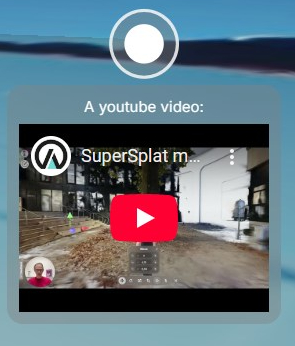
Youtube
Use the @[youtube] keyword to display a youtube video directly inside the annotation. The number in the round brackets is the ID of the video.
@[youtube](APJ3OViCjO4)
3Sound Entities
Sound entities let you place additional audio sources to enhance immersion and realism in your space. Add ambient elements like water, wind, or speech to bring your scene to life and create a more dynamic experience.
Placing Sound Entities
To place a sound entity, open the Action menu via , select Sound, and position the entity in your scene.
Edit Sound Entity
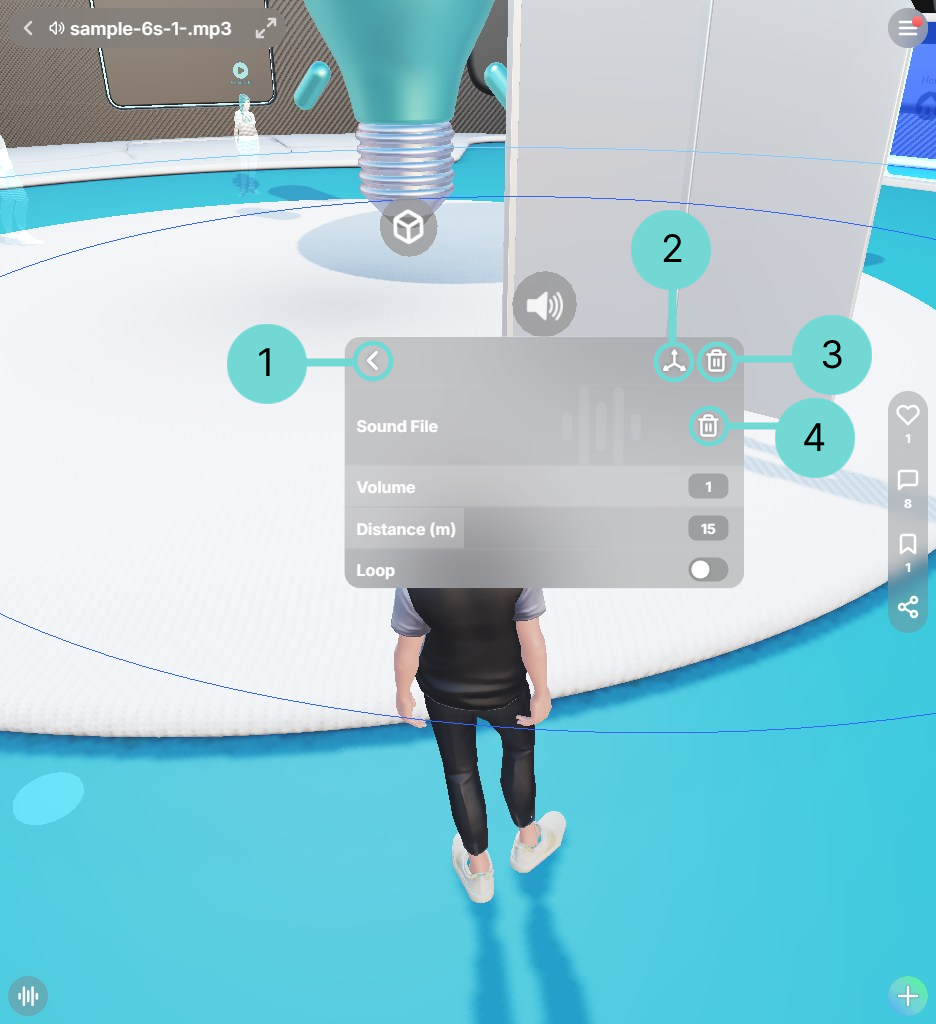
Back 1
The Back Button will reopen the content list and close the Sound Entity UI.
Open Sound Entity Gizmo 2This button opens the transformation gizmo, providing controls to move and rotate the selected Sound Entity.
Delete Sound Entity 3Use this button to remove the selected Sound Entity from your current space. The Sound file will also be removed.
Upload Sound File 4Upload your sound file.
Delete Sound File 4Delete your uploaded sound file. The Entity itself will remain.
Volume
The volume setting of the sound entity determines how far the sound can be heard. The lower the volume is set, the closer you need to be to hear it. The higher the volume, the farther the sound will carry through the space, making it audible from a greater distance.
Distance
The distance defines the "hard limit" of the sound. As soon as the sound UI is opened, 2 blue lines are displayed. The dark blue line is the radius at which the sound adjusts to the volume. The larger the radius, the more noticeable the difference in volume.
The light blue line is a "hard limit", if the user leaves this area the sound is no longer audible.
Loop
The loop option lets you choose whether your uploaded file should play continuously in a loop. This is especially useful for environment sounds.
4Additional Content
Sometimes you want to combine Gaussian splats with meshes. The additional Content function allows you to integrate various types of 3D content—whether it's combining meshes, Gaussian splats, or multiple 3D object files—into a single scene.
Placing add. Content
To place an additional Content, open the Action menu via , select Content, and position the entity in your scene. Selecting this option will launch your device's file explorer, allowing you to choose and upload your desired 3D model. After uploading, simply click on a location on the floor to place the model. You can use the right mouse to cancel the placement.
To modify a 3D Object after placement, you can either use the shortcut key G or reopen the Space Edit menu. As meshes and splats can be edited differently, they are dealt with and explained separately in the following chapters.
In the section Creating 3D Content you can find a simple description how 3D Objects works with a daily example to understand this content better.
Editing Meshes
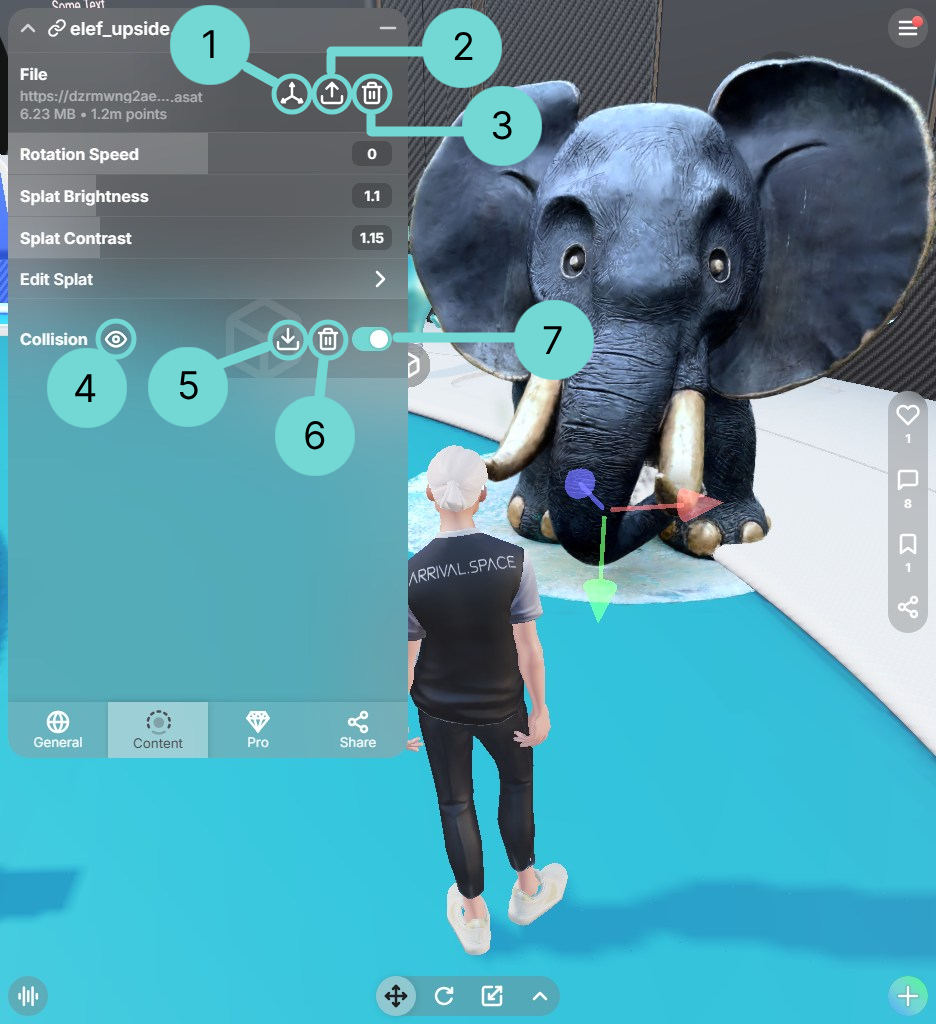
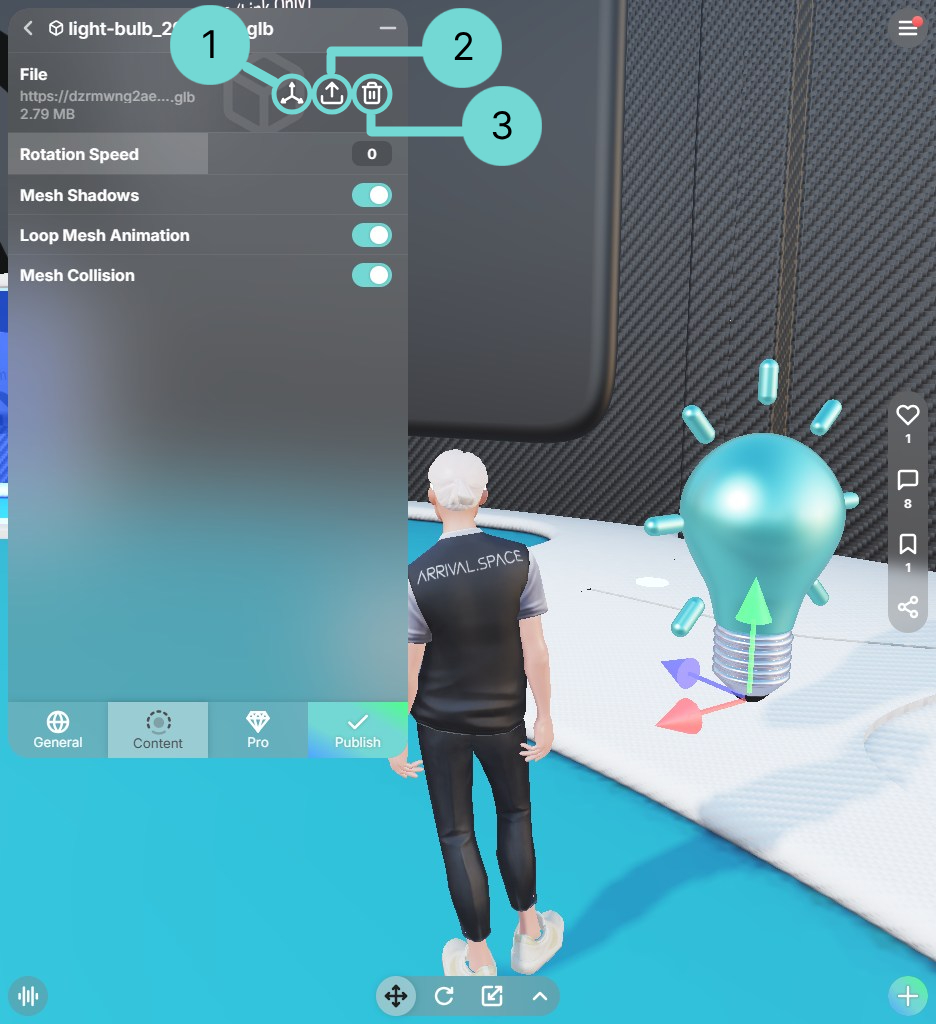 Open Gizmo 1
This button opens the transformation gizmo, providing controls to move, rotate, and scale the selected 3D model.
Upload/ Replace 2Selecting this allows you to upload a new 3D Object file, which will overwrite the currently loaded model.
Delete 3Use this button to completely remove the selected 3D model from your current space.
Rotation Speed
Rotates the asset around the Y axis. A positive value will rotate your asset clockwise. A negative value will rotate your asset counterclockwise.
Mesh Shadows
Control the center asset shadow. If your center asset is very large or emissive it can make sense to disable its shadow.
Loop Mesh Animation
Even with backed-in animations you can configure if the animation is only shown once or loop all the time.
Mesh Collision
By enabling this toggle, our system will automatically generate a Collision for your 3D Model. Also available for animated Assets.
Editing Gaussian Splats
 Open Gizmo 1
This button opens the transformation gizmo, providing controls to move, rotate, and scale the selected 3D model.
Upload/ Replace 2Selecting this allows you to upload a new 3D Object file, which will overwrite the currently loaded model.
Delete 3Use this button to completely remove the selected 3D model from your current space.
Rotation Speed
Rotates the asset around the Y axis. A positive value will rotate your asset clockwise. A negative value will rotate your asset counterclockwise.
Splat Brightness
Adjust the brightness of a splat. Use the input fields or drag the slider to the left or right to increase or decrease the value.
Splat Contrast
Adjust the contrast of your splat. Use the input fields or drag the slider to the left or right to increase or decrease the value.
Edit Splat
We offer our enhanced version of SuperSplat within Arrival.Spaces. This integration allows you to utilize all familiar SuperSplat operations. Furthermore, you can directly manipulate .spz files and save all changes by simply closing the SuperSplat window.
This option is only applicable to splat files (.SPZ, .PLY, .SPLAT).
Collision
A collision is your way to make splats walkable. You can upload your own collision file or use our automatic generation tool.
Generate CollisionClick this button to automatically generate a collision mesh for your uploaded splat. After generating this icon will change to the icon.
Show Collision 4If a collision has been uploaded or generated, clicking this button will display the collision mesh as a purple overlay. In addition to that a gizmo menu opens, which is used to change the position of your collision.
Hide Collision 4If the collision is perfectly placed, you can deactivate the gizmo by using this icon.
Download Collision Pro5Clicking this button will download the current collision mesh. This allows you to refine the collision boundaries in an external program before re-uploading the modified file. In the Creating 3D Content section you can find some helpful tools.
Delete Collision 6This will delete your collision.
After generating or uploading a collision, you can use this toggle to activate or deactivate your collision.
We have created a dedicated Space with video tutorials explaining how to upload splats, manipulate them using the Gizmo, and merge multiple splats while transferring them back to Arrival.Space.